Blog

  • ngx-highlightjs

    Angular Highlight.js

    Demo Stackblitz npm tests codecov Downloads Monthly Downloads npm bundle size (minified + gzip) License

    Instant code highlighting directives


    Table of Contents

    Install with NPM

    npm i ngx-highlightjs

    Use provideHighlightOptions to provide highlight.js options in app.config.ts

    import { provideHighlightOptions } from 'ngx-highlightjs';
    
    export const appConfig: ApplicationConfig = {
      providers: [
        provideHighlightOptions({
          fullLibraryLoader: () => import('highlight.js')
        })
      ]
    };

    Note: This includes the entire Highlight.js library with all languages.

    You can also opt to load only the core script and the necessary languages.

    Importing Core Library and Languages

    import { provideHighlightOptions } from 'ngx-highlightjs';
    
    export const appConfig: ApplicationConfig = {
      providers: [
        provideHighlightOptions({
          coreLibraryLoader: () => import('highlight.js/lib/core'),
          lineNumbersLoader: () => import('ngx-highlightjs/line-numbers'), // Optional, add line numbers if needed
          languages: {
            typescript: () => import('highlight.js/lib/languages/typescript'),
            css: () => import('highlight.js/lib/languages/css'),
            xml: () => import('highlight.js/lib/languages/xml')
          },
          themePath: 'path-to-theme.css' // Optional, useful for dynamic theme changes
        })
      ]
    };

    HighlightOptions API

    Name Description
    fullLibraryLoader A function returning a promise to load the entire highlight.js script
    coreLibraryLoader A function returning a promise to load the core highlight.js script
    lineNumbersLoader A function returning a promise to load the lineNumbers script for adding line numbers
    languages The languages to register with Highlight.js (Needed only if you opt to use coreLibraryLoader)
    config Set Highlight.js configuration, see configure-options
    lineNumbersOptions Set line numbers plugin options
    themePath The path to the CSS file for the highlighting theme

    Dynamic Approach

    Set the theme path in the global configuration to enable dynamic theme changes:

     providers: [
      {
        provide: HIGHLIGHT_OPTIONS,
        useValue: {
          // ...
          themePath: 'assets/styles/solarized-dark.css'
        }
      }
    ]

    Alternatively, import the theme from the app’s distribution folder or use a CDN link.

    When switching between app themes, call the setTheme(path) method from the HighlightLoader service.

    import { HighlightLoader } from 'ngx-highlightjs';
    
    export class AppComponent {
    
      private hljsLoader: HighlightLoader = inject(HighlightLoader);
    
      onAppThemeChange(appTheme: 'dark' | 'light') {
        this.hljsLoader.setTheme(appTheme === 'dark' ? 'assets/styles/solarized-dark.css' : 'assets/styles/solarized-light.css');
      }
    }

    Traditional Approach

    In angular.json:

    "styles": [
      "styles.css",
      "../node_modules/highlight.js/styles/github.css",
    ]
    

    Or directly in src/style.scss:

    @import 'highlight.js/styles/github.css';

    List of all available themes from highlight.js

    To apply code highlighting, use the highlight directive. It requires setting the target language, with an optional feature to ignore illegal syntax.

    import { Highlight } from 'ngx-highlightjs';
    
    @Component({
      selector: 'app-root',
      template: `
        <pre><code [highlight]="code" language="html"></code></pre>
      `,
      imports: [Highlight]
    })
    export class AppComponent {
    }

    Options

    Name Type Description
    [highlight] string Code to highlight.
    [language] string Parameter must be present and specify the language name or alias of the grammar to be used for highlighting.
    [ignoreIllegals] boolean An optional parameter that when true forces highlighting to finish even in case of detecting illegal syntax for the language instead of throwing an exception.
    (highlighted) HighlightResult Stream that emits the result object when element is highlighted

    The highlightAuto directive works the same way but automatically detects the language to apply highlighting.

    import { HighlightAuto } from 'ngx-highlightjs';
    
    @Component({
      selector: 'app-root',
      template: `
        <pre><code [highlightAuto]="code"></code></pre>
      `,
      imports: [HighlightAuto]
    })
    export class AppComponent {
    }

    Options

    Name Type Description
    [highlightAuto] string Accept code string to highlight, default null
    [languages] string[] An array of language names and aliases restricting auto detection to only these languages, default: null
    (highlighted) AutoHighlightResult Stream that emits the result object when element is highlighted

    The lineNumbers directive extends highlighted code with line numbers. It functions in conjunction with the highlight and highlightAuto directives.

    import { HighlightAuto } from 'ngx-highlightjs';
    import { HighlightLineNumbers } from 'ngx-highlightjs/line-numbers';
    
    @Component({
      selector: 'app-root',
      template: `
        <pre><code [highlightAuto]="code" lineNumbers></code></pre>
      `,
      imports: [HighlightAuto, HighlightLineNumbers]
    })
    export class AppComponent {
    }

    Options

    Name Type Description
    [singleLine] boolean Enable plugin for code block with one line, default false.
    [startFrom] number Start numbering from a custom value, default 1.

    NOTE

    During the project build process, you may encounter a warning stating WARNING in ... CommonJS or AMD dependencies can cause optimization bailouts.

    To address this warning, include the following configuration in your angular.json file:

    {
      "projects": {
        "project-name": {
          "architect": {
            "build": {
              "options": {
                "allowedCommonJsDependencies": [
                  "highlight.js"
                ]
              }
            }
          }
        }
      }
    }

    Read more about CommonJS dependencies configuration

    This package provides the following features:

    • Utilizes the gists API to highlight code snippets directly from GitHub gists.
    • Supports direct code highlighting from URLs.

    Usage

    To integrate this addon into your project, ensure the presence of HttpClient by importing it into your main.ts file.

    import { provideHttpClient } from '@angular/common/http';
    
    export const appConfig: ApplicationConfig = {
      providers: [
        provideHttpClient()
      ]
    };

    Highlight a gist file

    1. Use [gist] directive, passing the gist ID as its attribute, to retrieve the response through the (gistLoaded) output event.
    2. Upon the emission of (gistLoaded), gain access to the gist response.
    3. Use gistContent pipe to extract the file’s content from the gist response based on the specified file name.

    Example:

    import { HighlightPlusModule } from 'ngx-highlightjs';
    
    @Component({
      selector: 'app-root',
      template: `
        <pre [gist]="gistId" (gistLoaded)="gist = $event">
          <code [highlight]="gist | gistContent: 'main.js'"></code>
        </pre>
      `,
      imports: [HighlightPlusModule]
    })
    export class AppComponent {
    }

    Highlight all gist files

    To loop over gist?.files, use keyvalue pipe to pass file name into gistContent pipe.

    To highlight all files within a gist, iterate through gist.files and utilize the keyvalue pipe to pass the file name into the gistContent pipe.

    Example:

    import { HighlightPlusModule } from 'ngx-highlightjs';
    
    @Component({
      selector: 'app-root',
      template: `
        <ng-container [gist]="gistId" (gistLoaded)="gist = $event">
          @for (file of gist?.files | keyvalue; track file.key) {
            <pre><code [highlight]="gist | gistContent: file.key"></code></pre>
          }
        </ng-container>
      `,
      imports: [HighlightPlusModule, CommonModule]
    })
    export class AppComponent {
    }

    Highlight code from URL directly

    Use the pipe codeFromUrl with the async pipe to get the code text from a raw URL.

    Example:

    import { HighlightPlusModule } from 'ngx-highlightjs';
    
    @Component({
      selector: 'app-root',
      template: `
       <pre>
         <code [highlight]="codeUrl | codeFromUrl | async"></code>
       </pre>
      `,
      imports: [HighlightPlusModule, CommonModule]
    })
    export class AppComponent {
    }

    Providing Gist API secret (Optional)

    The package offers the provideHighlightOptions function, allowing you to set your clientId and clientSecret for the gist HTTP requests. You can provide these options in your app.config.ts file as demonstrated below:

    import { provideHttpClient } from '@angular/common/http';
    import { provideHighlightOptions } from 'ngx-highlightjs/plus'
    
    export const appConfig: ApplicationConfig = {
      providers: [
        provideHttpClient(),
        provideGistOptions({
          clientId: 'CLIENT_ID',
          clientSecret: 'CLIENT_SECRET'
        })
      ]
    };

    If you identify any errors in the library, or have an idea for an improvement, please open an issue.

    Murhaf Sousli

    Visit original content creator repository https://github.com/MurhafSousli/ngx-highlightjs
  • happy-care-mobile

    Happy Care

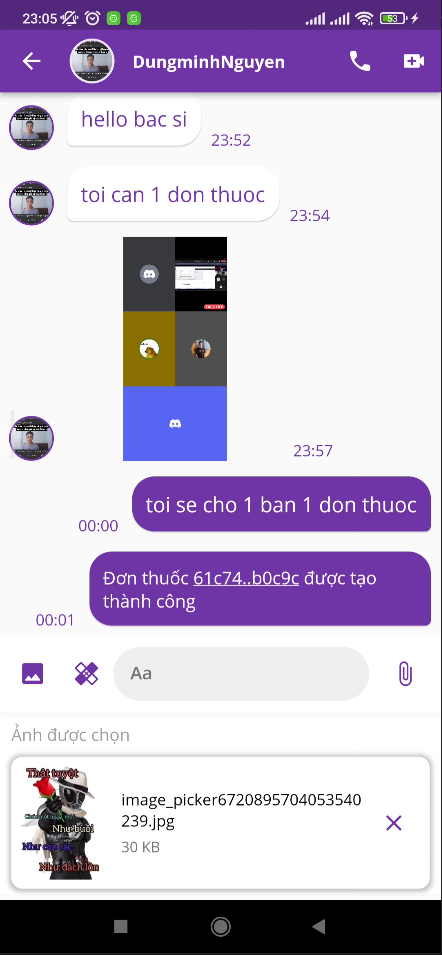
    Online Health Consultation Application built with Flutter for Client, ExpressJs for Backend Server (private repo sorry 😣).

    All Contributors Codacy Badge Flutter

    Features

    • Finding doctors, specializations by symptoms. (Currently, the feature is based on database, will upgrade with machine learning later)
    • Getting online doctors, busy doctors.
    • Asking member user about feeling today for finding doctor (30 mins loop).
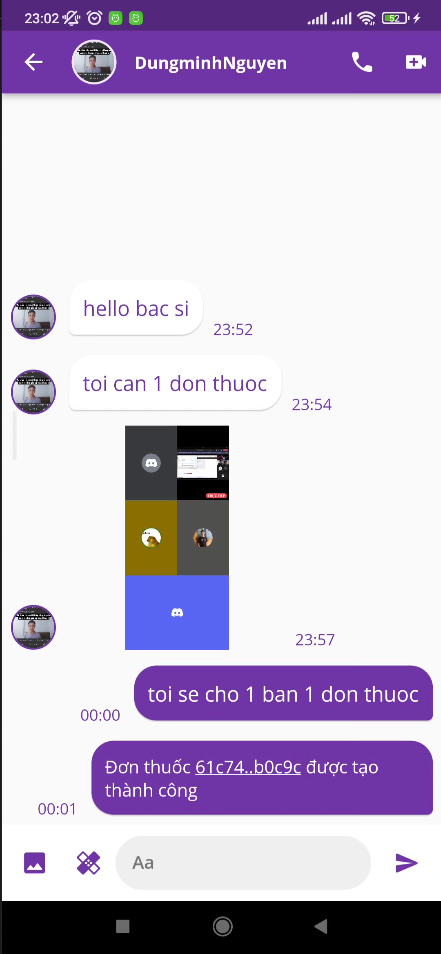
    • Chatting, sending image 1v1 between doctors and members.
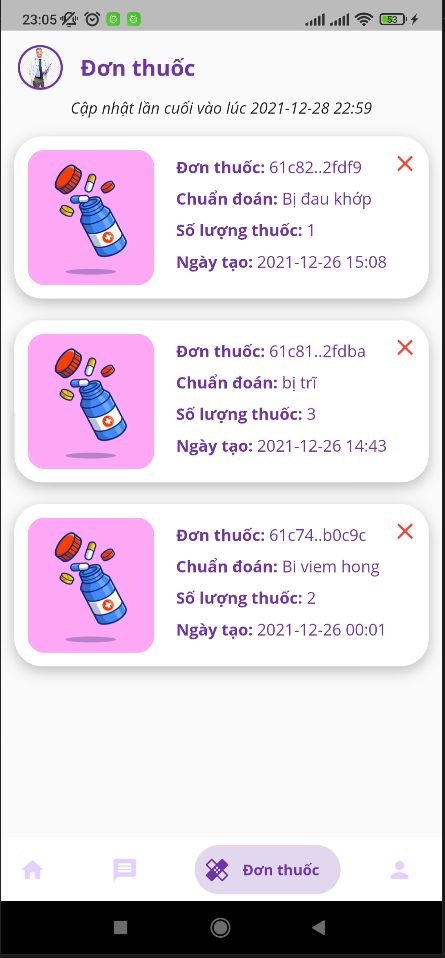
    • Doctors can create a new prescription for members.
    • Finding doctors by specialization.
    • User information CRUD.

    Technology used

    • Flutter GetX pattern, GetX for state management. (actually I want to use BLOC (Rx) but I only have 1 month to complete so I use Getx to do it faster. But GetX’s build-in DI is so stupid)
    • Authentication and Authorization using JWT.
    • Backend using ExpressJs, MongoDB.
    • Realtime event using Socket.io.
    • Cloudinary for storing images.

    Directory structure

    project
    │   README.md
    │
    │
    └───lib
    │   |
    │   └───core
    │   |   |
    │   │   └───helpers <--[Helpers function like customShowDialog(context)]
    │   |   |
    │   │   └───themes  <--[Colors]
    │   |   |
    │   │   └───utils   <--[logger, validator, cache manager, sharedPref,..]
    │   │
    │   └───data
    │   |   |
    │   │   └───api  <-[Provider data from remote]
    │   |   |
    │   │   └───models
    │   |   |
    │   │   └───repositories
    │   |   |
    │   │   └───services
    │   |           |
    │   │           └───socket_io_service.dart  <--[Socket.io service]
    │   │           |
    │   │           └───cloudinary_service.dart <--[Cloudinary service]
    │   │
    │   └───modules <-[Screens, Controllers, Binding,... support modules]
    │   |
    │   └───routes  <-[Define routes and pages for named navigator, binding]
    │   |
    │   └───widgets <-[Common widgets for reusing]
    │   |
    │   └───main.dart
    │
    │
    └───assets
            └───icons
            |
            └───images
            |
            └───logos
            |
            └───lottie <-[lottie animation]
            |
            └───.env <-[.env for environment]
    

    Setup and run

    Click to expand
    • Download APK
    • Setup and run
      • Flutter
        • Install Flutter.
        • Using stable channel:
          ❯ flutter channel stable
          ❯ flutter upgrade
        • Flutter doctor:
          ❯ flutter doctor
        • Install all the packages by:
          ❯ flutter pub get
        • Create .env file assets/.env has following structure:
          BASE_URL=https://komkat-happy-care.herokuapp.com
        • Run app on real devices or emulator by:
          ❯ flutter run
          or debug mode in VSCode or some IDEs

    Screenshots (Running Stable in Mi 9)

    Sorry for some UIs are not designed in advance, it will be not responsive for 16:9, not as beautiful as the intro, sign in, sign up because there is no time, just code in mind 😣

    Splash, Intro, SignIn, SignUp

    View Screenshots
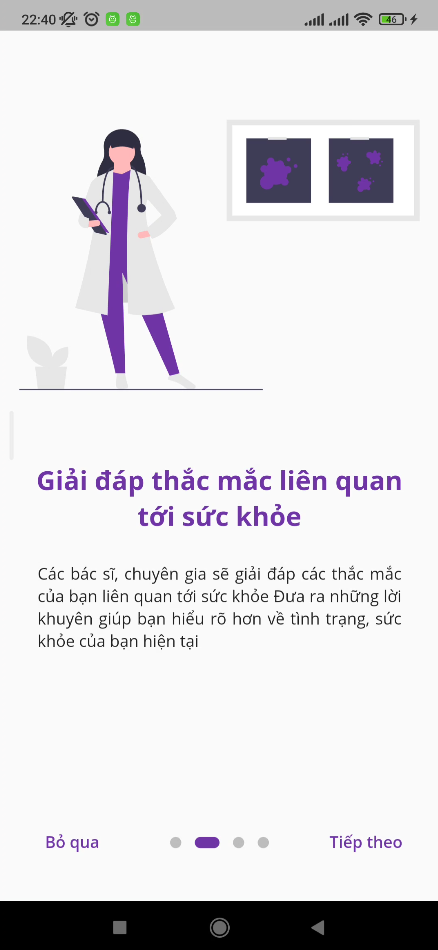
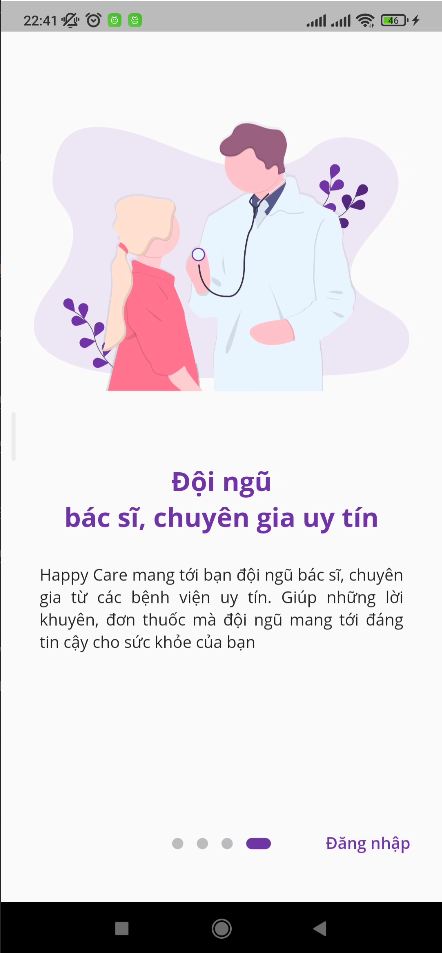
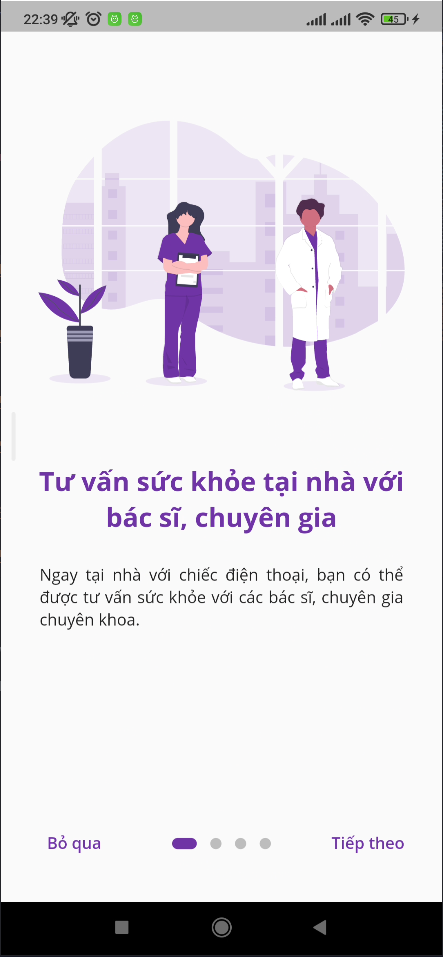
    Splash Screen Intro1 Intro2
    Intro3 Intro4
    Sign In Sign Up

    Main Screen (Member Role)

    View Screenshots
    Home Screen Choose if you feel good Choose if you feel bad to finding doctor
    More Symptoms Result for choosing symptoms Choose Doctor
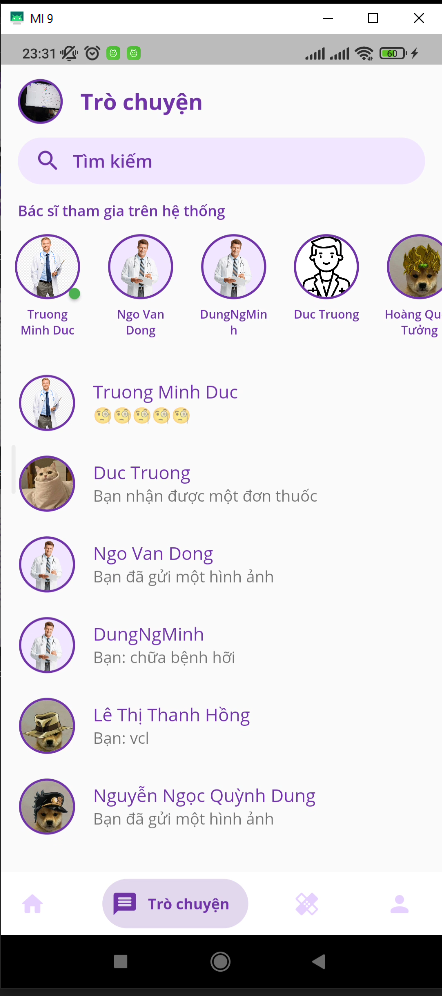
    Search Chat Screen Chat Room
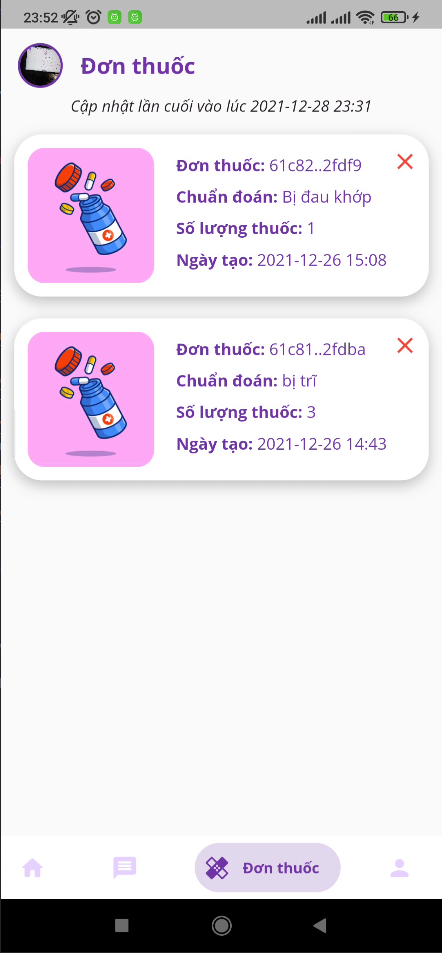
    Chat With Typing Event Socket Image Preview Before Sending All Prescriptions
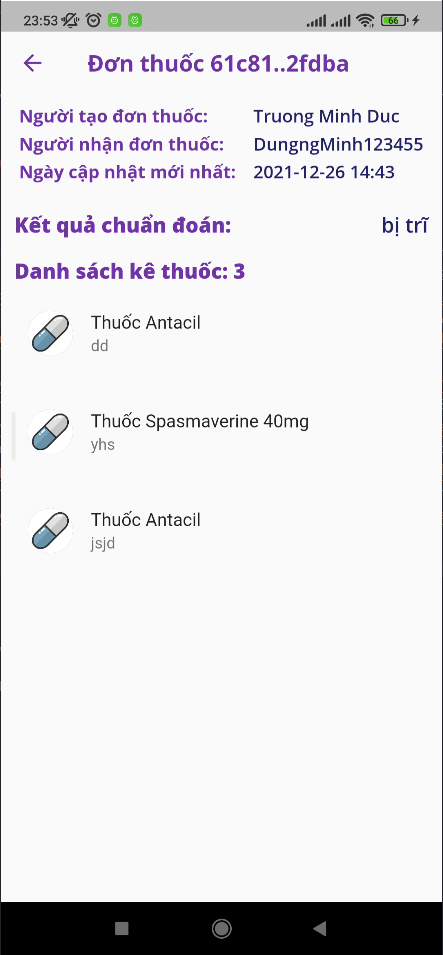
    Detail Prescription Detail Information Member role Edit Information
    Detail Information Doctor Change password dialog Dialog choose avatar
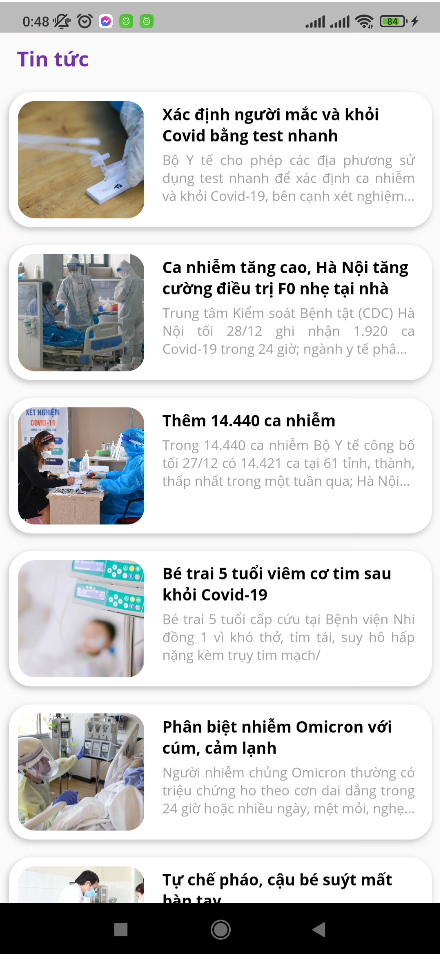
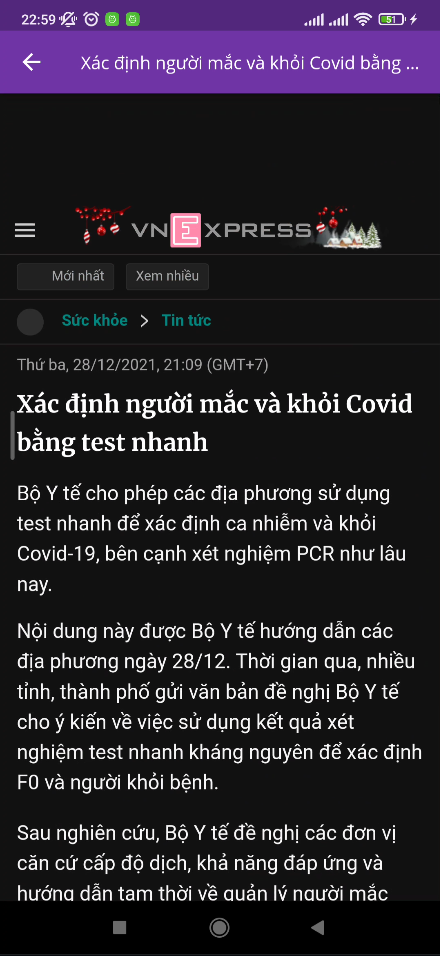
    More news WebView

    Main Screen (Doctor Role)

    View Screenshots
    Home Screen Chat Screen Chat Room
    Chat With Typing Event Socket Create Precription Image Preview Before Sending
    All Prescriptions Detail Prescription Edit a Prescription
    Detail Information Doctor role Edit Information Dialog choose avatar
    More news WebView

    Some gif(s)

    View gif(s)
    Finding Doctor By Symptoms

    Todo

    • WebRTC for voice, video call
    • Notifications
    • Rebuild UI (i think no no no because i am very lazy 😣)

    Contributors ✨


    Nguyễn Minh Dũng
    💻 📖
    Visit original content creator repository https://github.com/dungngminh/happy-care-mobile
  • video-cut-tool

    An online tool to cut/trim videos in Wikimedia commons.

    See live demo at: https://videocuttool.wmcloud.org/

    Learn More

    You can learn more in the https://commons.wikimedia.org/wiki/Commons:VideoCutTool.

    Installation

    Get OAuth2 Credentials

    Go to:

    https://meta.wikimedia.org/wiki/Special:OAuthConsumerRegistration/propose.

    Create an application with the following grants:

    • Edit existing pages.

    • Create, edit, and move pages.

    • Upload new files.

    • Upload, replace, and move files.

    If its for production, use call back URL as: https://videocuttool.wmcloud.org/api/auth/mediawiki/callback

    Add the keys to server/config.js file under CLIENT_ID and CLIENT_SERCRET after you clone the repo.

    Connecting to Cloud VPS Servers

    Cloud VPS Horizon URL: https://horizon.wikimedia.org

    videocuttool instance using ssh -J <username>@primary.bastion.wmflabs.org <username>@videocuttool.videocuttool.eqiad1.wikimedia.cloud

    nc-videocuttool instance using ssh -J <username>@primary.bastion.wmflabs.org <username>@nc-videocuttool.videocuttool.eqiad1.wikimedia.cloud

    Installing VideoCutTool in server

    Install the following utilities

    • git
    • node version v16.15.1
    • npm version v8.12.1
    • ffmpeg
    • mongodb
    • nginx

    Database

    • View the users list using the following commands
      • Connect to mongo using shell – mongo
      • show databases
      • use video-cut-tool
      • db.users.find({}, {"_id":0, username : 1})

    Install Docker

    The tool uses docker to install and run everything with a single command.

    Install docker from this link: https://docs.docker.com/get-docker/

    Clone Repo

    Run these commands to clone the code from the remote repo.

    
    git clone "https://gerrit.wikimedia.org/r/labs/tools/VideoCutTool"
    
    cd ./VideoCutTool


    Run environment

    Run this command inside VideoCutTool to start development docker container.

    docker-compose -f .\docker-compose.dev.yml up --build

    The first time you run it will take some time 4-8 minutes (depending on your internet speed) because it will pull the necessary images from docker and install NPM packages. Once it is up and running changes will be hot loaded.

    Note: anytime you update package.json the build process will take a while.

    To run production you can run this command

    docker-compose -f .\docker-compose.prd.yml up -d

    Credits

    VideoCutTool is created by Gopa Vasanth as a part of 2019 Google Summer of Code in the mentorship of Pratik shetty, Hassan Amin and James Heilman.

    Khr2003 joined as a co-maintainer of the tool and revamped code base.

    Visit original content creator repository
    https://github.com/gopavasanth/video-cut-tool

  • Bibliography

      Book                   Author                    Tags                Read
      ---------------------- ------------------------- ------------------- ---------
    - Programming as Theory  Peter Naur                programming         -
      Building
    - Being and Time         Heidegger                                     -
    - Natural Categories     Eleanor Rosch             psychology research -
    - The Annotated Turing   Charles Petzold                               -
    - The Art of Computer    Donald E. Knuth                               -
      Programming I
    - The Art of Computer    Donald E. Knuth                               -
      Programming II
    - Linkers & Loaders      Morgan Kaufmann                               -
    - Principia Mathematica  Bertrand Russel, Alfred                       -
      1.                     Whitehead
    - 97 Things Every        Kevlin Henney                                 Completed
      Programmer Should Know
    - Peopleware: Productive Tom DeMarco;Timothy       software projects   Completed
      Projects and Teams     Lister
    - The Pragmatic          Andrew Hunt; David Thomas programming         Completed
      Programmer: From
      Journeyman to Master


    From the jargon file
    ====================
    
    History and "history"
    ---------------------
    
    [Levy] Hackers. Steven Levy. Anchor/Doubleday. Copyright © 1984. ISBN 0-385-19195-2. 
    [Kelly-Bootle] The Computer Contradictionary. Stan Kelly-Bootle. MIT Press. Copyright © 1995. ISBN 0-262-61112-0. 
    [Jennings] The Devouring Fungus: Tales from the Computer Age. Karla Jennings. Norton. Copyright © 1990. ISBN 0-393-30732-8. 
    [Kidder] The Soul of a New Machine. Tracy Kidder. Avon. Copyright © 1982. ISBN 0-380-59931-7. 
    [Markoff-ampersand-Hafner] Cyberpunk: Outlaws and Hackers on the Computer Frontier. Katie Hafner. John Markoff. Simon & Schuster. Copyright © 1991. ISBN 0-671-68322-5. 
    [Stoll] The Cuckoo's Egg. Clifford Stoll. Doubleday. Copyright © 1989. ISBN 0-385-24946-2. 
    Paul Dickson's “Words” (Dell, 1982, ISBN 0-440-52260-7)
     1930 Sellar & Yeatman "1066 And All That"
    
    Fiction
    -------
    
    [Vinge] True Names ... and Other Dangers. Vernor Vinge. Baen Books. Copyright © 1987. ISBN 0-671-65363-6. 
    
    Unix
    ----
    
    [Libes] Life with UNIX: a Guide for Everyone. Don Libes. Sandy Ressler. Prentice-Hall. Copyright © 1989. ISBN 0-13-536657-7. 
    
    BSD
    ---
    
    "the daemon book"
    
      The Design and Implementation of the 4.3BSD UNIX Operating System, by Samuel J. Leffler, Marshall Kirk McKusick, Michael J. Karels, and John S. Quarterman (Addison-Wesley Publishers, 1989, ISBN 0-201-06196-1)
    
      The Design and Implementation of the 4.4 BSD Operating System by Marshall Kirk McKusick, Keith Bostic, Michael J. Karels and John S. Quarterman (Addison-Wesley Longman, 1996, ISBN 0-201-54979-4) 
      
    Perl
    ----
    
    "the camel book"
    
    Programming Perl, by Larry Wall and Randal L. Schwartz, O'Reilly and Associates 1991, ISBN 0-937175-64-1 (second edition 1996, ISBN 1-56592-149-6; third edition 2000, 0-596-00027-8, adding as authors Tom Christiansen and Jon Orwant but dropping Randal Schwartz).


    Programming, Comp Sci
    -----------
    
    Jon Bentley, "More Programming Pearls" (not in bibliography)
    
    "the wizard book"
    Structure and Interpretation of Computer Programs (Hal Abelson, Jerry Sussman and Julie Sussman; MIT Press, 1984, 1996; ISBN 0-262-01153-0)
    Available: https://mitpress.mit.edu/sites/default/files/sicp/index.html
    
    "the dragon book"
    Compilers: Principles, Techniques and Tools, by Alfred V. Aho, Ravi Sethi, and Jeffrey D. Ullman (Addison-Wesley 1986; ISBN 0-201-10088-6)
    
    "the aluminum book"
    [MIT] Common LISP: The Language, by Guy L. Steele Jr. (Digital Press, first edition 1984, second edition 1990).
    
    "the Cinderella book"
    [CMU] Introduction to Automata Theory, Languages, and Computation, by John Hopcroft and Jeffrey Ullman, (Addison-Wesley, 1979).
    
    paper on "the wheel of reincarnation"
    T.H. Myer and I.E. Sutherland "On the Design of Display Processors", Comm. ACM, Vol. 11, no. 6, June 1968
    

    Visit original content creator repository
    https://github.com/oj-lappi/Bibliography

  • fastapi-best-practices-zh-cn

    Visit original content creator repository
    https://github.com/hellowac/fastapi-best-practices-zh-cn

  • nostro

    NostrO

    License: ODbL Go Report Card goreleaser Latest Release

    Nostr Osint Tool 🔎 𓅦

    Nostr Logo

    NostrO is a tool designed for conducting Open Source Intelligence (OSINT) operations on Nostr.
    NostrO facilitates operations such as retrieving relay or user infos, search on notes, and more.

    Development

    I welcome pull requests and contributions!
    This tool is a CLI implemented with cobra and go-nostr library.
    I suggest using VS Code for local development.
    For debugging you can create a launch.json file similar to the following (change the command you want to test):

    {
        "version": "0.2.0",
        "configurations": [
            {
                "name": "Launch Package",
                "type": "go",
                "request": "launch",
                "mode": "auto",
                "program": "${workspaceFolder}/main.go",
                "args": ["relay", "--info", "bitcoinmaximalists.online"],
                "env": {},
                "showLog": true
            }
        ]
    }

    Examples

    Command Help
    nostro --help
    Welcome to NostrO 🔎 𓅦
    
    Usage:
      nostro [flags]
      nostro [command]
    
    Available Commands:
      completion  Generate the autocompletion script for the specified shell
      dm          Operations on direct messages
      event       Operations on events
      help        Help about any command
      notes       Operations on notes
      relay       Operations on relays
      user        Operations on users
    
    Flags:
      -h, --help   help for nostro
    
    Use "nostro [command] --help" for more information about a command.
    
    nostro relay --help
    Retrieve data on nostr relays
    
    Usage:
      nostro relay [flags]
    
    Flags:
      -h, --help   help for relay
          --info   Retrieve relay information document (nip-11)
    Retrieve relay info
    nostro relay --info relay.nostrview.com
    ####################### RELAY INFO #######################
    NAME:  relay.nostrview.com
    DESCRIPTION:  Nostrview relay
    PUB KEY:  2e9397a8c9268585668b76479f88e359d0ee261f8e8ea07b3b3450546d1601c8
    CONTACT:  2e9397a8c9268585668b76479f88e359d0ee261f8e8ea07b3b3450546d1601c8
    SUPPORTED NIPS:  [1 2 4 9 11 12 15 16 20 22 26 28 33 40 111]
    SOFTWARE:  git+https://github.com/Cameri/nostream.git
    VERSION:  1.22.2
    LIMITATION:  &{524288 10 10 5000 256 4 2500 102400 0 false true}
    PAYMENTSURL:  https://relay.nostrview.com/invoices
    ##########################################################
    Retrieve user info from the specified relay
    nostro user --info npub1rusgp3upyrtpsy2pcqznl6e8hejg9ne8u2eg05gzc4n2cctsugksvcx2np nos.lol
    ####################### USER INFO #######################
    [[i github:R3DRUN3 0f954e6fada304dacdb8e7389eefaf2b]]
    Name: r3drun3
    Picture: https://i.postimg.cc/rwTgJm0G/symbol-1.gif
    Username: r3drun3
    Display Name: r3drun3
    Banner: https://i.postimg.cc/90FYS0D7/1327483.png
    Website: 
    About: ᚱᛊᚧᚱVᚺᛊ
    Jus a collection of quantum bits,
    constantly phasing between cyberspace and meatspace.
    Running #Bitcoin
    Nip05: r3drun3@vlt.ge
    Lud16: me@ln.stackzoo.io
    Lud06: 
    Created At: 1689593935
    Nip05 Valid: false
    ##########################################################
    Retrieve the specified event from the specified relay
    nostro event --info note1se5g5crjxaaet4vzy3xtpurv4as3dsfd5dteglk4z3f2xafstl5qyry4m3 nos.lol
    
    ####################### EVENT INFO #######################
    ID: 86688a6072377b95d582244cb0f06caf6116c12da357947ed51452a375305fe8
    PubKey: 1f2080c78120d6181141c0053feb27be6482cf27e2b287d102c566ac6170e22d
    Kind: 1
    Created At: 1696529147
    Tags: [[t osint] [t osint] [t Nostr] [t nostr] [t github] [t github] [r https://github.com/r3drun3/nostro] [r https://image.nostr.build/7a83f1b7b006bdecd047731c6b0fcec54d1a5186ae222f3e98e15953850712f4.jpg]]
    Content: I believe that one of the best ways to learn a technology is to experiment and build upon it. That's why I've started developing a tool for performing #osint operations on #Nostr on my #github. 
    Feel free to collaborate if you want ☺
    https://github.com/r3drun3/nostro
    
    
    https://image.nostr.build/7a83f1b7b006bdecd047731c6b0fcec54d1a5186ae222f3e98e15953850712f4.jpg
    Signature: 9b3b4af0bac8df5f62dd54b8f5be34bdee7545e0a6453fe6e3462861d29390282e95a4e85f8d2bf801d1f0da3ccc955b3ecff0ffbc6786ffa7d1c7017650b34a
    ##########################################################
    Retrieve a user contact list from the specified relay
    nostro user --contactlist npub1rusgp3upyrtpsy2pcqznl6e8hejg9ne8u2eg05gzc4n2cctsugksvcx2np nos.lol
    returned events saved to user_contact_list.json
    Retrieve from the specified relay the last 300 direct messages that the specified user received
    nostro dm --userreceived npub1rusgp3upyrtpsy2pcqznl6e8hejg9ne8u2eg05gzc4n2cctsugksvcx2np nos.lol
    returned events saved to user_received_direct_messages.json
    Retrieve from the specified relay the last 300 notes that the specified user wrote
    nostro notes --userwritten npub1rusgp3upyrtpsy2pcqznl6e8hejg9ne8u2eg05gzc4n2cctsugksvcx2np nos.lol
    returned events saved to user_written_notes.json
    Retrieve from the specified relay the last 300 notes in which the specified user has been tagged
    nostro notes --usertagged npub1rusgp3upyrtpsy2pcqznl6e8hejg9ne8u2eg05gzc4n2cctsugksvcx2np nos.lol
    returned events saved to user_tagged_notes.json
    Retrieve from the specified relay the last 300 notes from the specified user that have been reposted
    nostro notes --userreposted npub1rusgp3upyrtpsy2pcqznl6e8hejg9ne8u2eg05gzc4n2cctsugksvcx2np nos.lol
    returned events saved to user_reposted_notes.json
    Retrieve from the specified relay the last 300 reaction received by notes from the specified user
    nostro notes --userreacted npub1rusgp3upyrtpsy2pcqznl6e8hejg9ne8u2eg05gzc4n2cctsugksvcx2np nos.lol
    returned events saved to user_reacted_notes.json

    For all available command use the cli help function.

    Visit original content creator repository https://github.com/R3DRUN3/nostro
  • detaxizer

    nf-core/detaxizer

    Cite Preprint Cite with Zenodo

    GitHub Actions CI StatusGitHub Actions Linting StatusAWS CI nf-test

    Nextflow nf-core template version run with conda run with docker run with singularity Launch on Seqera Platform

    Get help on SlackFollow on BlueskyFollow on MastodonWatch on YouTube

    Introduction

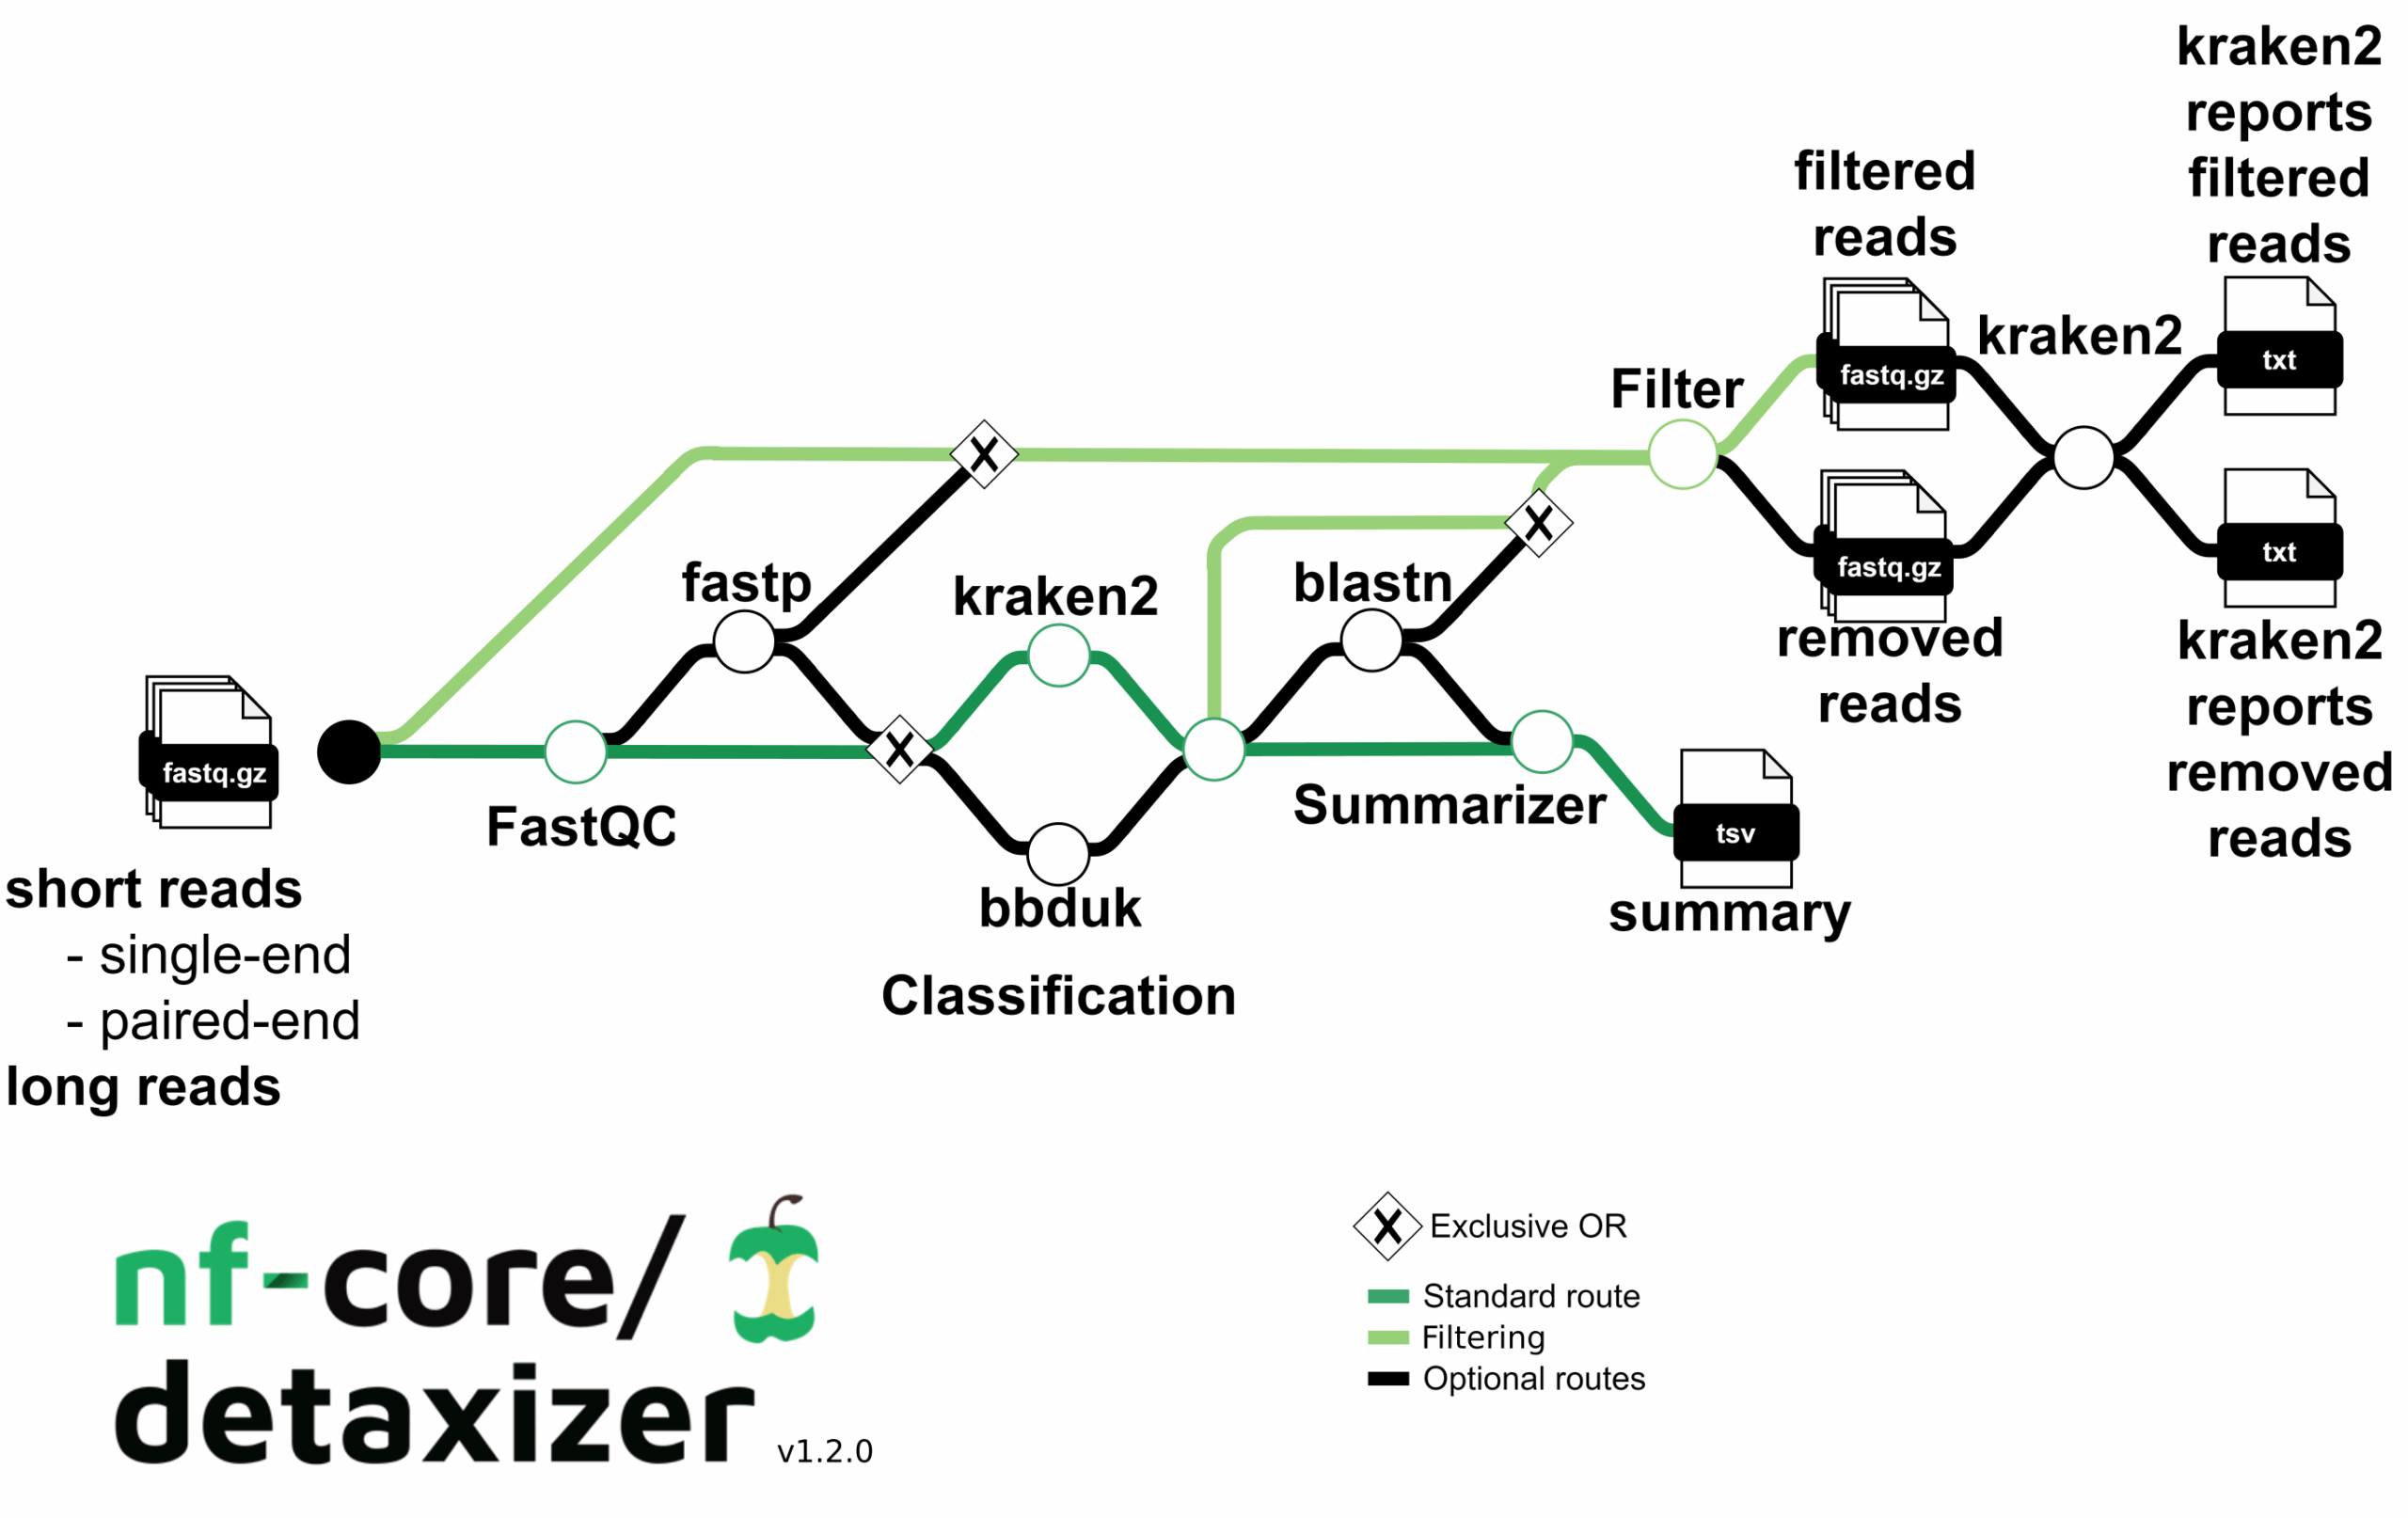
    nf-core/detaxizer is a bioinformatics pipeline that checks for the presence of a specific taxon in (meta)genomic fastq files and to filter out this taxon or taxonomic subtree. The process begins with quality assessment via FastQC and optional preprocessing (adapter trimming, quality cutting and optional length and quality filtering) using fastp, followed by taxonomic classification with kraken2 and/or bbduk, and optionally employs blastn for validation of the reads associated with the identified taxa. Users must provide a samplesheet to indicate the fastq files and, if utilizing bbduk in the classification and/or the validation step, fasta files for usage of bbduk and creating the blastn database to verify the targeted taxon.

    detaxizer metro workflow

    1. Read QC (FastQC)
    2. Optional pre-processing (fastp)
    3. Classification of reads (Kraken2, and/or bbduk)
    4. Optional validation of searched taxon/taxa (blastn)
    5. Filtering of the searched taxon/taxa from the reads (either from the raw files or the preprocessed reads, using either the output from the classification (kraken2 and/or bbduk) or blastn)
    6. Summary of the processes (how many were classified and optionally how many were validated)
    7. Present QC for raw reads (MultiQC)

    Usage

    Note

    If you are new to Nextflow and nf-core, please refer to this page on how to set-up Nextflow. Make sure to test your setup with -profile test before running the workflow on actual data.

    First, prepare a samplesheet with your input data that looks as follows:

    sample,short_reads_fastq_1,short_reads_fastq_2,long_reads_fastq_1
    CONTROL_REP1,AEG588A1_S1_L002_R1_001.fastq.gz,AEG588A1_S1_L002_R2_001.fastq.gz,AEG588A1_S1_L002_R3_001.fastq.gz
    

    Each row represents a fastq file (single-end) or a pair of fastq files (paired end). A third fastq file can be provided if long reads are present in your project. For more detailed information about the samplesheet, see the usage documentation.

    Now, you can run the pipeline using:

    nextflow run nf-core/detaxizer \
       -profile <docker/singularity/.../institute> \
       --input samplesheet.csv \
       --classification_bbduk \
       --classification_kraken2 \
       --outdir <OUTDIR>

    Warning

    Please provide pipeline parameters via the CLI or Nextflow -params-file option. Custom config files including those provided by the -c Nextflow option can be used to provide any configuration except for parameters; see docs.

    For more details and further functionality, please refer to the usage documentation and the parameter documentation.

    Pipeline output

    To see the results of an example test run with a full size dataset refer to the results tab on the nf-core website pipeline page. For more details about the output files and reports, please refer to the output documentation.

    Generated samplesheets from the directory /downstream_samplesheets/ can be used for the pipelines:

    Credits

    nf-core/detaxizer was originally written by Jannik Seidel at the Quantitative Biology Center (QBiC).

    We thank the following people for their extensive assistance in the development of this pipeline:

    This work was initially funded by the German Center for Infection Research (DZIF).

    Contributions and Support

    If you would like to contribute to this pipeline, please see the contributing guidelines.

    For further information or help, don’t hesitate to get in touch on the Slack #detaxizer channel (you can join with this invite).

    Citations

    If you use nf-core/detaxizer for your analysis, please cite it using the following preprint:

    nf-core/detaxizer: A Benchmarking Study for Decontamination from Human Sequences

    Jannik Seidel, Camill Kaipf, Daniel Straub, Sven Nahnsen

    bioRxiv 2025.03.27.645632 doi: 10.1101/2025.03.27.645632.

    Additionally, the following doi can be cited: 10.5281/zenodo.10877147

    An extensive list of references for the tools used by the pipeline can be found in the CITATIONS.md file.

    You can cite the nf-core publication as follows:

    The nf-core framework for community-curated bioinformatics pipelines.

    Philip Ewels, Alexander Peltzer, Sven Fillinger, Harshil Patel, Johannes Alneberg, Andreas Wilm, Maxime Ulysse Garcia, Paolo Di Tommaso & Sven Nahnsen.

    Nat Biotechnol. 2020 Feb 13. doi: 10.1038/s41587-020-0439-x.

    Visit original content creator repository https://github.com/nf-core/detaxizer
  • behat-css-extension

    Behat css Extension

    (not yet an extension, but usable)
    It extends the mink extension to actual usuable, chained css expressions

    You need:

    • behat
    • behat/mink-extension
    • behat/mink-selenium2-driver
    • symfony/css-selector
    • hamcrestphp

    installation

    compose require --dev webforge/behat-css-extension
    

    you need to install (additional to your normal behat setup):

    "behat/behat": "^3.5",
    "behat/mink-extension": "^2.3",
    "behat/mink-selenium2-driver": "^1.3",
    

    use those dependencies in your dev-dependencies.

    usage

    Use in your BehatFeatureContext:

    use Behat\MinkExtension\Context\MinkContext;
    use Behat\Behat\Context\Context;
    use Webforge\Behat\CssUtilitiesTrait;
    
    class MyFeatureContext extends MinkContext implements Context
    {
        use CssUtilitiesTrait;
    
        /**
         * @Given /^I wait for the page to load$/
         */
        public function iWaitForThePageToLoad()
        {
            $this->context = $this->css('.v-dialog--active')->exists();
            $this->context('.container .headline:contains("Wähle dein Fotobuch-Format")')->waitForVisible(5000);
        }
    
    
       /**
         * @When /^I click on the position button$/
         */
        public function iClickOnThePositionButton()
        {
            $this->css('.v-btn:contains("Position")')->exists()->click();
        }
    
        /**
         * @Given /^I click on the undock headline icon$/
         */
        public function iClickOnTheUndockHeadlineIcon()
        {
            $this->context('.v-btn:contains("Überschrift ablösen")')->exists()->click();
        }
        
        /**
         * @Given /^the headline is displayed in text$/
         */
        public function theHeadlineIsDisplayedInText()
        {
            $this->css('.pb-container.headline')->waitForExist() // selector is:  .pb-container.headline
                ->css('.headline.visible')->notExists()->end() // selector is: .pb-container.headline .headline.visible 
                ->css('.headline h1')->isNotVisible(); // selector is now: .pb-container.headline .headline h1 
        }
    }
    • use $this->css($selector) to start from document, $selector is a valid css3 selector (supported by symfony/css-selector)
    • set $this->context to whatever dialog/page/subarea you want to select elements
    • use $this->context() to start from context
    • use $this->resetContext() to reset context to document
    • use wait*, exists, isVisible, isNotVisible to make assertions against your selected element
    • move down with ->css() to find sub-selectors
    • move with ->end() back up to the chain, to the last css() call
    • use all(), getElements(), get* to retrieve elements, attributes or others an break the chain

    Visit original content creator repository
    https://github.com/webforge-labs/behat-css-extension

  • nodemcu-ws2812-toy

    nodemcu-ws2812-toy

    A little toy script using Lua for the NodeMCU to play with a WS2812 LED Strip

    WS2812 Toy
    Author: Andre Alves Garzia
    Date: 2017-05-11
    

    This is just a demo of WS2812, shining some LEDs with Lua. It plays three animations and stop.
    The code is quite naive, focused on creating very explicit and readable code even though it is
    spaghetti-ish.

    • Animation Strip Runner *
      The first animation, fills the strip with blue LEDs which run accross the strip and fade.

    • Animation Police *
      Blinks half the LED in Red and half in Blue, alternating, like a police lights.

    • Animation Rainbow *
      Randomize the colors of all LEDs and then animating them moving circularly in the strip.

    • All animations run for a number of iterations and then switch.
    • The animation is controlled using the timer module.
    • There are two functions for each animation:
      • one that starts it and schedule the timer.
      • one that animates it and is called by the timer on each iteration.

    REMEMBER TO READ THE MANUAL

    URL: https://nodemcu.readthedocs.io/en/master/en/modules/ws2812/

    THE WS2812 MODULE

    Has the pin D4 (NodeMCU) / 2 (ESP8266) hardcoded as where the strip is attached to. Use it.

    Be aware that even though WS2812 LEDs are called RGB LEDs, the order of the colors is not actually RGB,
    it usually is GRB, don’t ask me why.

    Visit original content creator repository
    https://github.com/soapdog/nodemcu-ws2812-toy