Blog

  • community-ruby-planningcenter-orbit

    Planning Center to Orbit Workspace Ruby App

    Build Status Gem Version Contributor Covenant

    Add your Planning Center interactions into your Orbit workspace with this community-built integration.

    New Planning Center check-in for event in Orbit screenshot

    This is a community project. The Orbit team does its best to maintain it and keep it up to date with any recent API changes.
    We welcome community contributions to make sure that it stays current.

    There are three ways to use this integration. Install package - build and run your own applications. Run the CLI - run on-demand directly from your terminal. Schedule an automation with GitHub - get started in minutes - no coding required

    First Time Setup

    To set up this integration you will need your Planning Center API secret and your Planning Center app ID. See the below table for instructions on where to find them, along with your Orbit API credentials.

    Application Credentials

    The application requires the following environment variables:

    Variable Description More Info
    PLANNING_CENTER_APP_ID Planning Center App ID Create a new “Personal Access Token” in the Planning Center Developer Dashboard, your Application ID will be shown after creating it.
    PLANNING_CENTER_API_SECRET Planning Center API secret Create a new “Personal Access Token” in the Planning Center Developer Dashboard, your API secret will be shown after creating it.
    ORBIT_API_KEY API key for Orbit Found in Account Settings in your Orbit workspace
    ORBIT_WORKSPACE_ID ID for your Orbit workspace Last part of the Orbit workspace URL, i.e. https://app.orbit.love/my-workspace, the ID is my-workspace

    Package Usage

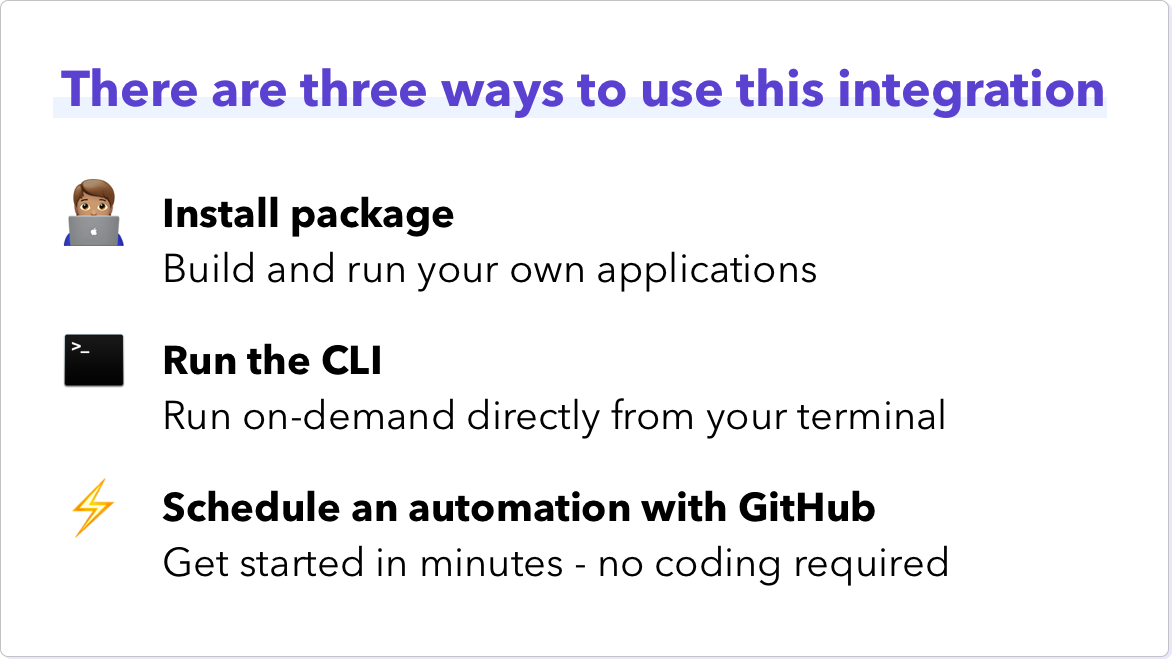
    To install this integration in a standalone app, add the gem to your Gemfile:

    gem "planningcenter_orbit"

    Then, run bundle install from your terminal.

    You can instantiate a client by either passing in the required credentials during instantiation or by providing them in your .env file.

    Instantiation with credentials:

    client = PlanningcenterOrbit::Client.new(
        orbit_api_key: YOUR_API_KEY,
        orbit_workspace_id: YOUR_ORBIT_WORKSPACE_ID,
        pc_app_id: YOUR_PLANNING_CENTER_APP_ID,
        pc_api_secret: YOUR_PLANNING_CENTER_API_SECRET
    )

    Instantiation with credentials in dotenv file:

    client = PlanningcenterOrbit::Client.new

    Performing a Historical Import

    By default, the integration will only import activities that are newer than the newest Planning Center activity in your Orbit workspace. You may want to perform a one-time historical import to fetch all your previous Planning Center activities and bring them into your Orbit workspace. To do so, instantiate your client with the historical_import flag:

    client = PlanningcenterOrbit::Client.new(
      historical_import: true
    )

    Fetching Planning Center Event Check-ins

    Once, you have an instantiated client, you can fetch event check-ins from Planning Center and send them to Orbit by invoking the #check_ins instance method:

    client.check_ins

    CLI Usage

    You can also use this package with the included CLI. To use the CLI pass in the required environment variables on the command line before invoking the CLI:

    $ ORBIT_API_KEY=... ORBIT_WORKSPACE_ID=... LINKEDIN_TOKEN=... LINKEDIN_ORGANIZATION=... bundle exec planningcenter_orbit --check-event-checkins

    Add the --historical-import flag to your CLI command to perform a historical import of all your Planning Center data using the CLI.

    GitHub Actions Automation Setup

    ⚡ You can set up this integration in a matter of minutes using our GitHub Actions template. It will run regularly to add new activities to your Orbit workspace. All you need is a GitHub account.

    See our guide for setting up this automation.

    Contributing

    We 💜 contributions from everyone! Check out the Contributing Guidelines for more information.

    License

    This is available as open source under the terms of the MIT License.

    Code of Conduct

    This project uses the Contributor Code of Conduct. We ask everyone to please adhere by its guidelines.

    Visit original content creator repository https://github.com/orbit-love/community-ruby-planningcenter-orbit
  • qed

    QED – Scalable, auditable and high-performance tamper-evident log

    User Documentation Status Build Status Azure DevOps coverage GoReport GoDoc
    http://littlekiwi.top/wp-content/uploads/2025/08/qed_logo_small.png

    QED is an open-source software that allows you to establish trust relationships by leveraging verifiable cryptographic proofs.

    It can be used in multiple scenarios:

    • Data transfers.
    • System (or application or business) logging.
    • Distributed business transactions.
    • Etc.

    QED guarantees that the system itself, even when deployed into a non-trusted server, cannot be modified without being detected. It also provides verifiable cryptographic proofs in logarithmic relation (time and size) to the number of entries.

    QED is scalable, resilient and ops friendly:

    • Designed to manage billions of events per shard
    • Over 2000 operations per second per shard under sustained load
    • Consistent replication through RAFT
    • Operable and instrumented with dozens of metrics
    • Zero config files, fully documented single binary

    Documentation

    You can find the complete documentation at: Documentation

    Project code

    You can find the project code at Github

    Authors

    QED was made by Hyperscale BBVA-Labs Team.

    License

    QED is Open Source and available under the Apache 2 license.

    Contributions

    Contributions are very welcome. See docs/source/contributing/contributing.rst or skim existing tickets to see where you could help out.

    Visit original content creator repository https://github.com/BBVA/qed
  • SplayTree-Cplusplus

    SplayTree-Cplusplus

    A C++ SplayTree implementation.

    It includes a C++ implementation from an Splay Tree.

    Files

    -SplayTree.h: Contains the header of the Splay Tree. It’s what you have to include to you projects to use the Splay Tree.

    -SplayTree.cpp: Real implementation of the Splay Tree. It contains the implementation of all the methods written in SplayTree.h

    -test.cpp: Testing file. It uses this SplayTree to execute random operations. It prints all the execution times in “result.dat”.

    Operations

    -Search(int element): It looks for a node with element as the value associated. It returns true if it founds it. False if not.

    -Remove(int element): It looks for a node with element as the value associated and it tries to remove it. It return true if it existed.
    False if not.

    -Insert(int element): It puts inside the tree a node with element as the value associated. If already exists a node like this, we return false.
    If everything worked correctly and there’s not a node with value=element, we return true.

    Visit original content creator repository
    https://github.com/bselles/SplayTree-Cplusplus

  • nexus-ssl-nodepki

    Sonatype Nexus with Self Signed Certificates in docker

    Setting up SSL certificates in Sonatype Nexus can be a somewhat daunting task (like modifing jetty-https.xml) if one isn’t a developer.

    I’ve made a docker-compose.yml which will modify the jetty-https.xml with the right settings, installs a little PKI infrastructue whith the help of NodePKI to generate root certificates which can be installed on all systems which need to connect to Nexus and which will generate a server certificate for Nexus itself in Nexus’ own keystore.

    TLDR;

    • Generate root and server certificates with NodePKI
    • import root certificate on your host
    • import server certificate in Nexus and
    • start Nexus

    Start NodePKI

    docker-compose up -d nodepki
    

    (nodepki takes some time to start!)

    nodepki

    Goto http://localhost:5001 and generate root certificate and a certificate for your nexus host, eg. “nexus.example.local”
    Note: NodePKI takes some time to start!

    Generate and Import root certificate

    Goto http://docker_host:5001/ and generate root certificate, download the certificate.

    Add root certificate in Mac OSX

    Double-click the root_certificate.pem, add it to System in Keystore, double click it and “trust always” and close(!) the Keystore to save.

    Add root certificate in Ubuntu

    Convert cerificate to crt and place it in /usr/share/ca-certificates/extra

    $ openssl x509 -in root_ca.cert.pem -inform PEM -out root_ca.cert.crt &&\
       sudo cp root_ca.cert.crt /usr/local/share/ca-certificates &&\
       sudo update-ca-certificates
    

    Generate server certificate

    Generate server certificate for your nexus host, eg. “nexus.example.local”. The files will be written into /certs which is linked into the nexus container and will picked up in the next step.

    Import certificate in Nexus’ keystore

    $ docker-compose run nodepki ash -c 'cd /certs/nexus.example.local && openssl pkcs12 -export -in signed.crt   -inkey domain.key  -chain -CAfile chained.pem   -name "my-domain.com" -out my.p12'
    

    And use password ‘password’

    $ docker-compose run nexus ash -c 'cd /certs/nexus.example.local && keytool -importkeystore -deststorepass password -destkeystore /nexus-data/keystore.jks -srckeystore my.p12 -srcstoretype PKCS12'
    

    Start Nexus

    $ docker-compose up -d nexus
    $ docker-compose logs -f nexus
    

    wait until these logs are shown:

    nexus_1    | 2017-08-29 07:42:28,302+0000 INFO  [jetty-main-1] *SYSTEM org.eclipse.jetty.server.ServerConnector - Started ServerConnector@74fa680b{SSL,[ssl, http/1.1]}{0.0.0.0:443}
    nexus_1    | 2017-08-29 07:42:28,303+0000 INFO  [jetty-main-1] *SYSTEM org.eclipse.jetty.server.Server - Started @82804ms
    nexus_1    | 2017-08-29 07:42:28,304+0000 INFO  [jetty-main-1] *SYSTEM org.sonatype.nexus.bootstrap.jetty.JettyServer -
    nexus_1    | -------------------------------------------------
    nexus_1    |
    nexus_1    | Started Sonatype Nexus OSS 3.4.0-02
    nexus_1    |
    nexus_1    | -------------------------------------------------
    

    Goto https://nexus.example.local which will now show a valid certificate!

    Troubleshooting

    Import certs in java

    keytool -printcert -rfc -sslserver hostname > hostname.pem
    keytool -importcert -file hostname.pem -keystore $(/usr/libexec/java_home)/jre/lib/security/cacerts -storepass changeit
    

    openssl x509 -outform der -in ~/root_ca.cert.pem -out certificate.der
    sudo keytool -import -alias your-alias -keystore $(/usr/libexec/java_home)/jre/lib/security/cacerts -storepass changeit -file certificate.der
    

    Fix OrientDB

    $ docker-compose exec nexus java -jar ./lib/support/nexus-orient-console.jar

    CONNECT PLOCAL:/opt/sonatype/sonatype-work/nexus3/db/component admin admin
    REBUILD INDEX *
    REPAIR DATABASE --fix-graph
    REPAIR DATABASE --fix-links
    REPAIR DATABASE --fix-ridbags
    REPAIR DATABASE --fix-bonsai
    DISCONNECT
    

    Visit original content creator repository
    https://github.com/marcelmaatkamp/nexus-ssl-nodepki

  • eggjs-common-api

    server-config-api

    基于Egg.js的 RESTful API 工程,用于快速集成开发RESTful前后端分离的服务端。

    特性

    • 框架选择:基于 Egg.js 2.0
    • 🔒 授权验证:基于JWT
    • 🚀 内置功能:文件处理,用户系统,统一错误处理及接口返回标准,全方位CRUD,分页,模糊查询的等数据操作Demo
    • 最佳实践:接口设计适配 Ant Design Pro 或 微信小程序开发等。(内置分页及ant接口返回标准)

    QuickStart

    see egg docs for more detail.
    see mongoose docs for more detail.

    Development

    $ cd app & mkdir public & cd public & mkdir uploads
    $ npm i
    $ npm run dev
    $ open http://localhost:7001/

    Deploy

    $ npm start
    $ npm stop

    npm scripts

    • Use npm run lint to check code style.
    • Use npm test to run unit test.
    • Use npm run autod to auto detect dependencies upgrade, see autod for more detail.

    工程结构

    eggjs-api
    ├── README.md
    ├── README.zh-CN.md
    ├── app
    │   ├── controller
    │   │   ├── home.js
    │   │   ├── mock.js
    │   │   ├── role.js
    │   │   ├── user.js
    │   │   └── userAccess.js
    │   ├── extend
    │   │   ├── RESTfulHTTPStatus.rec
    │   │   ├── context.js
    │   │   ├── helper.js
    │   │   └── note.rec
    │   ├── middleware
    │   │   └── error_handler.js
    │   ├── model
    │   │   ├── attachment.js
    │   │   ├── role.js
    │   │   └── user.js
    │   ├── router.js
    │   └── service
    │       ├── actionToken.js
    │       ├── role.js
    │       ├── upload.js
    │       ├── user.js
    │       └── userAccess.js
    ├── appveyor.yml
    ├── config
    │   ├── config.default.js
    │   └── plugin.js
    ├── logs
    │   └── eggjs-api
    │       ├── common-error.log
    │       ├── egg-agent.log
    │       ├── egg-schedule.log
    │       ├── egg-web.log
    │       └── eggjs-api-web.log
    ├── package.json
    └── tools
    

    Visit original content creator repository
    https://github.com/Swenson1992/eggjs-common-api

  • Computer-Vision-Course-Assignments

    Computer Vision Course Assignments

    This repository hosts my solutions to three practical programming assignments from a Computer Vision course, taught by Professor Renato Martins. The assignments delve into computer vision’s geometric and semantic analysis of real-world scenes, with a focus on image formation, feature extraction, 3D reconstruction, and the integration of machine learning techniques.

    Course Goals

    • Understand geometric and semantic properties of real-world scenes from images.
    • Learn fundamental low-level vision topics, including image formation, feature extraction, and 3D reconstruction.
    • Enable practical development and training of computer vision models, paving the way for advanced studies in Deep Learning.

    Assignments and Contents

    Each assignment folder (Assignment1_tracker, Assignment2_recognition, Assignment3_epipolar) contains:

    • A Jupyter Notebook with detailed solutions.
    • The dataset or images used.
    • A comprehensive PDF report summarizing findings and methodologies.
    • A .yml file to recreate the environment used (myharris_track.yml, cv_recognition.yml, epipolar.yml).
    • PDF instructions provided by Professor Renato Martins for the assignments.

    Assignment I – Corner Detection & Feature Tracking

    Folder: Assignment1_tracker

    Implements a Harris corner detector for tracking keypoints over time using patch templates and SIFT descriptors on the KITTI Visual Odometry dataset’s first 200 frames.

    Environment: myharris_track.yml

    SIFT Robust Tracking GIF

    Assignment II – Object Recognition & Augmented Reality with Homographies

    Folder: Assignment2_recognition

    Focuses on object recognition and robust homography estimation with RANSAC, including an augmented reality application that replaces Van Gogh’s “Nuit étoilée” painting with the ESIREM logo in various MoMA museum images.

    Environment: cv_recognition.yml

    Assignment III – Epipolar Geometry & 8-Point Algorithm

    Folder: Assignment3_epipolar

    Estimates the fundamental matrix for an uncalibrated camera using the 8-Point Algorithm, demonstrating a foundational understanding of epipolar geometry in stereo vision contexts.

    Environment: epipolar.yml

    Technologies

    • Python
    • PyTorch (for tensor operations)
    • OpenCV (for debugging and result verification)

    Setup and Execution

    Each assignment folder contains a .yml file with the necessary environment setup. To create and activate the environment for an assignment, run:

    conda env create -f environment_file.yml
    conda activate environment_name

    Replace environment_file.yml and environment_name with the appropriate file and environment name for the assignment you’re working on.

    Contributions

    These assignments represent my original work, showcasing a comprehensive effort to apply and extend computer vision techniques learned during the course. Feedback and discussions on the methodologies and results are welcome.

    Acknowledgements

    Special thanks to Professor Renato Martins for his invaluable guidance and to my peers for their constructive critiques throughout the course.

    Note

    High-level OpenCV implementations are used solely for debugging purposes and result verification. The core tasks rely on fundamental computer vision and machine learning concepts as per course requirements.

    References

    Visit original content creator repository https://github.com/GraceSevillano/Computer-Vision-Course-Assignments
  • uni

    Do More, Write less

    A universal and optimized interface for handle package managers, UNI recipes and automating tasks on them in Linux distributions.
    fund issues on issuehunt become a patron or sponsor donate on paypal version get-recipes current support license


    UNI is an abstraction layer that allows you to manage different package managers or UNI Recipes using the same UNI commands regardless of the distribution you are using and automates repetitive tasks on them.


    Table of Contents

    Goal

    Make an easy interface to abstract repetitive commands related to package management. Join tasks that require the execution of others without spending time typing one by one. Make it easy to work between different distributions by always using the same UNI commands regardless of the distribution you are using.

    How it Works?

    UNI uses your main package manager to do the things and abstracts the original commands through a simple and universal UNI interface.

    Example

    Command Alias Description
    uni upgrade uni up Upgrades deeply the system and remove useless dependencies.

    This will trigger the following commands on Ubuntu:

    sudo apt-get update
    sudo apt-get upgrade -y
    sudo apt-get dist-upgrade -y
    sudo apt-get autoremove -y

    This will trigger the following commands on Fedora:

    sudo dnf upgrade -y
    sudo dnf autoremove -y

    Using Recipes

    uni bake gif

    Now you can use available recipes too or create your owns and publish it here. Recipes are bash scripts to do anything. Be it to install programs and resolve dependencies or fix system problems. Anything you want and can do with bash scripts.

    Example

    Command Alias Description
    uni bake atom-install uni b atom-install Installs the latest version of
    Atom Editor from their
    official website and resolve
    dependency issues.

    Check here the list of available recipes for usage. You can also type uni --recipes to fetch the current list of recipes from GitHub and display in your terminal.

    Installation

    Ubuntu and based distributions:

    wget -O upm https://git.io/v1UKq && chmod +x upm && ./upm && rm upm

    Fedora ( supports only dnf for now ):

    wget -O upm https://git.io/v1UKO && chmod +x upm && ./upm && rm upm

    Uninstallation

    Command Alias Description
    uni remove-me uni rm-me Removes uni

    Documentation

    Contributing

    I’ve created a ‘recompiler’ tool to help us to test locally using uni command on terminal normally during the development.

    So, let’s check the contributing guide here.

    Visit original content creator repository https://github.com/uni-linux/uni
  • masalla-icon-theme

    masalla-icon-themes
    Masalla icon theme by hayder majid (hayder ctee) hayder@riseup.net
    Theme inspired by the latest flat design trend.
    The name of project is inspired from Obelisk name in arabic language (like Obelisk of Hammurabi in History of Iraq) .
    This project is part from URUK project https://urukproject.org , all icons are licensed under GPL-3.0+ License http://www.gnu.org/licenses/gpl-3.0.html

    How to install:

    (NOTE: if you use KDE, you should install icons as root)
    1- Download the “.tar.gz” file from here:
    https://github.com/masalla-art/masalla-icon-theme/releases
    and extract it.

    2- You can simply install icon theme by running “INSTALL” script to make them available for local users,
    OR run this script as root to make them available for all users, then choose “masalla icon theme” from your system setting (tweak tool , unity tweak , lxappearance ,….etc)

    3- choose “masalla icon theme” from your system setting (tweak tool , unity tweak , lxappearance ,….etc)

    4- To remove theme, run “UNINSTALL” script.

    NOTE: If you are using KDE desktop then run the following commands too:

       sudo rm -rf /usr/share/icons/YOUR_MASALLA_COLOR/index.theme
       sudo cp /usr/share/icons/YOUR_MASALLA_COLOR/index.theme.kde /usr/share/icons/YOUR_MASALLA_COLOR/index.theme
    

    and if you want to move back to other gtk+ desktop (gnome, cinnamon, xfce4, lxde, ….), then run the following commands:

       sudo rm -rf /usr/share/icons/YOUR_MASALLA_COLOR/index.theme
       sudo cp /usr/share/icons/YOUR_MASALLA_COLOR/index.theme.back /usr/share/icons/YOUR_MASALLA_COLOR/index.theme
    

    have fun and be free ^^

    Visit original content creator repository
    https://github.com/masalla-art/masalla-icon-theme

  • protect-client-js-code

    Protect(Secure?) Javascript Code

    An example of obfuscating Angular components to make code as difficult to read as possible. (The purpose of a minifier is to optimise code for the faster delivery. Meanwhile, an obfuscator has a different intention. )

    Start with angular-7-webpack-4-boilerplate

    webpack.config.prod.js

    + var JavaScriptObfuscator = require('webpack-obfuscator');


    module.exports = webpackMerge(commonConfig, {
        mode: 'production',
    
        output: {
            path: helpers.root('dist'),
            publicPath: "https://github.com/",
    +        filename: '[name].[hash].js'
    -        chunkFilename: '[id].[hash].chunk.js'
        },
    
        optimization: {
            
            ...
            
            minimizer: [
                
                // minimize vendor-specific codes 
                new UglifyJsPlugin({
     +              test: /(vendor|runtime|polyfills).*\.js(\?.*)?$/i,
                    cache: true,
                    parallel: true
                }),
      
                ...
                
            ]
        },
    
        ...
        
        plugins: [
           
            ...
                    // obfuscating user code only
     +       ,new JavaScriptObfuscator ({
     +             rotateUnicodeArray: true
     +             ,deadCodeInjection: true
     +             ,deadCodeInjectionThreshold: 1
     +             ,stringArrayEncoding: 'base64'
     +             ,stringArrayThreshold: 1
     +         }, [ 'vendor**.js','runtime**.js', 'polyfills**.js'] )
            
        ]
    });
    

    deadCodeInjection& deadCodeInjectionThreshold(0.4:default) insert ‘garbage code’ to make harder to be reverserd-engineered. Ultimately those options increase the filesize.

    If you’d like to explore other options, visit JavaScript Obfuscator Tool

    Build & Run

     $ npm run build:prod
     $ npm run serve
    

    Related Posts :

    Visit original content creator repository
    https://github.com/phyunsj/protect-client-js-code